What you will get
- Turn messy photos into repeatable texture tiles.
- Know when to use region select versus surface extraction.
- Repair seams and preserve believable material wear in the same workflow.
AI Generation
Convert photos, scans, and existing artwork into tileable textures using region selection, surface extraction, seam guidance, and post-processing designed for game surfaces.
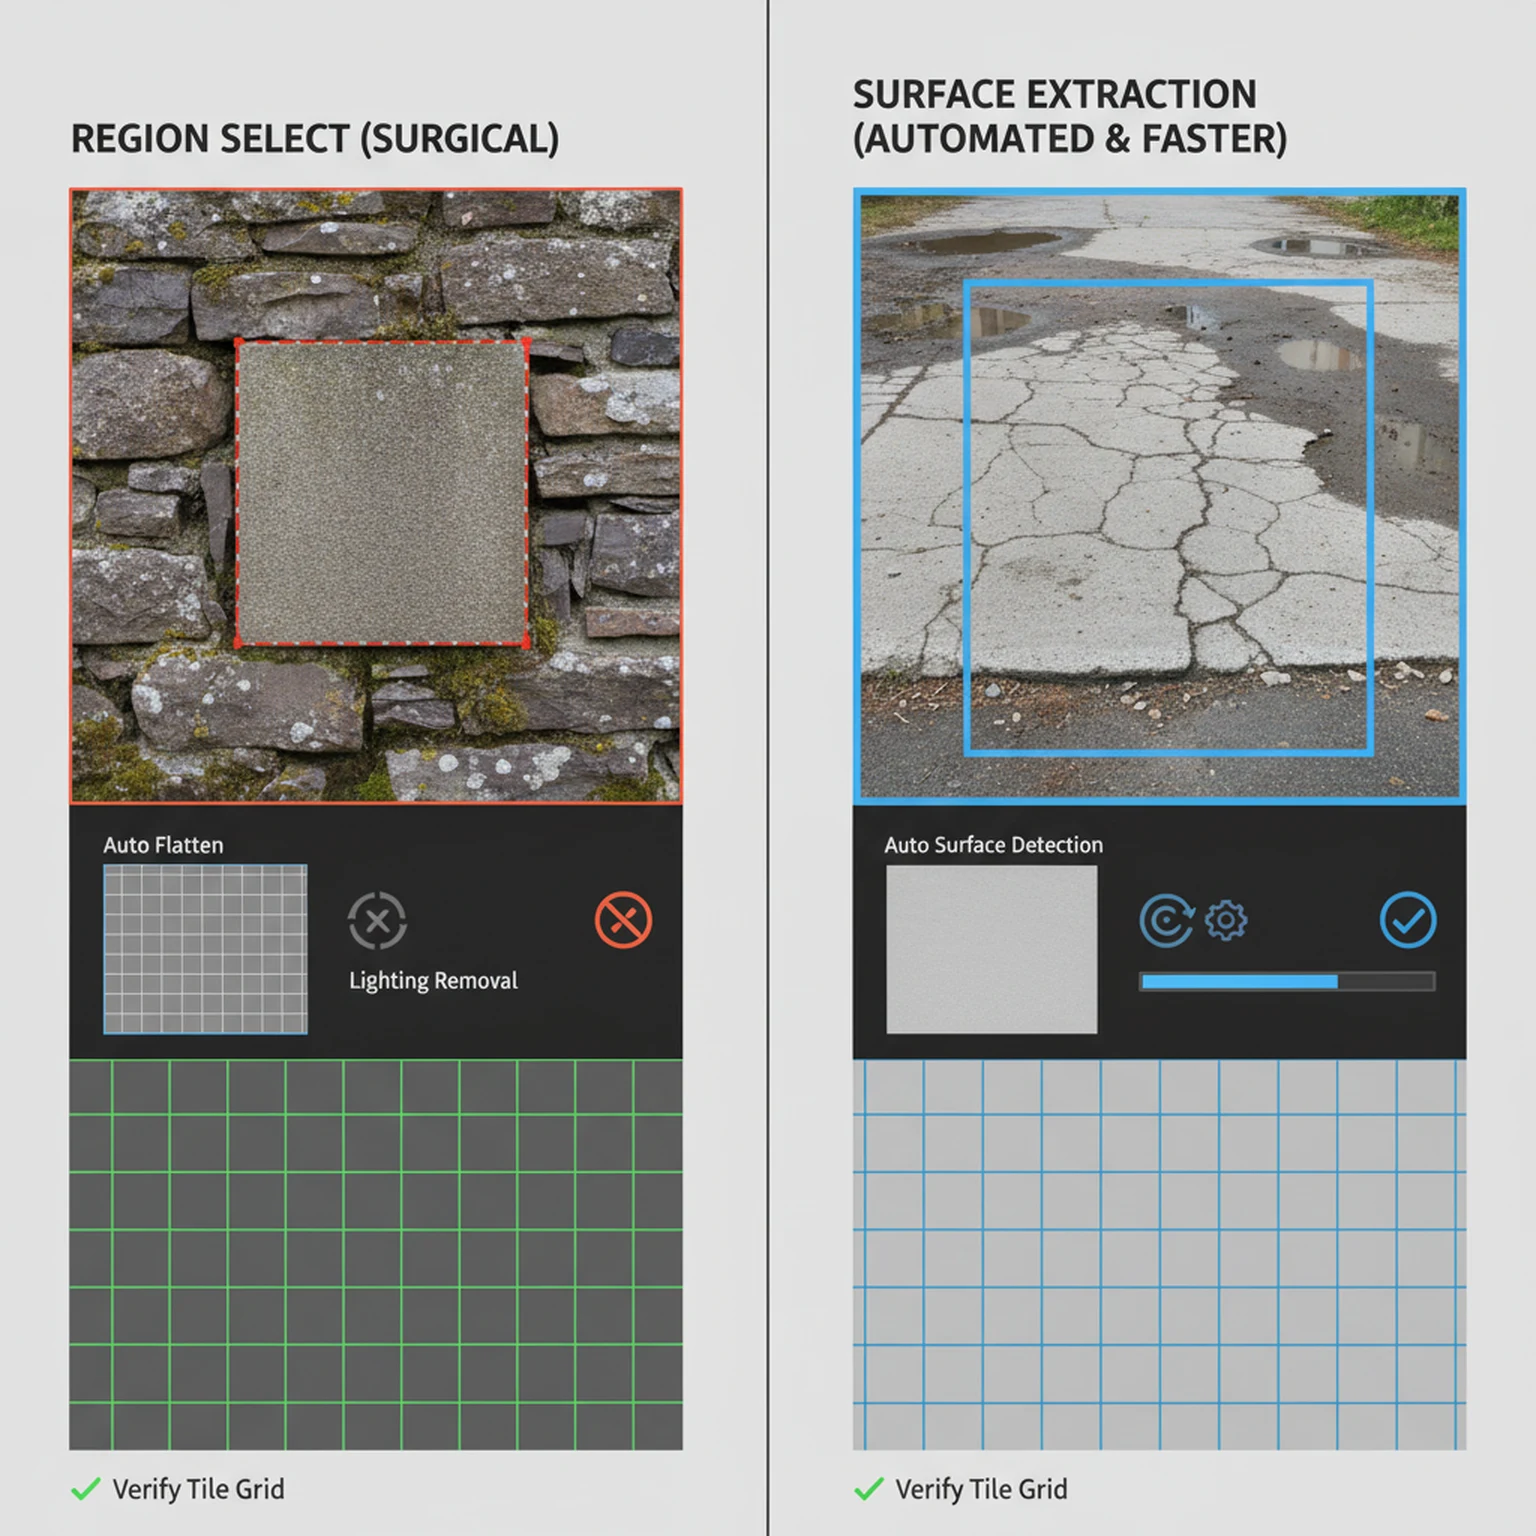
Most seamless-texture tutorials focus too early on the seam itself and not enough on the condition of the source image. In real production, the seam is only one symptom. If the photo has perspective distortion, harsh lighting direction, mixed materials, or weak surface coverage, the tile will struggle even if the edges technically repeat. That is why PLAYTEX AI separates the intake workflow into Region Select and Surface Extraction. Before you optimize the tile, you need to decide how the source should be interpreted.
This is where the tool is most helpful to artists working from photos, scans, or concept references. Region Select is the right choice when you already know the exact patch you want and the source is mostly trustworthy. Surface Extraction is the better choice when the image is messy and you need the system to find, flatten, and rebuild a more usable surface area first. In both cases, the goal is the same: produce a clean base texture that can survive repetition without obvious artifacts.
Use Region Select for exact patch control and Surface Extraction for interpretation. Region Select exposes crop, legacy surface type, style, pattern scale, variation, and clean-to-worn. Surface Extraction exposes auto-detect or explicit surface categories, source-style preservation, lighting handling, pattern behavior, game type, variation, and a generated-surface review panel.
A lot of source cleanup is really about deciding what should be preserved and what should be removed. Lighting removal is a good example. For many photographs it is the difference between a usable material source and a misleading one, because strong directional sun or camera flash makes the surface behave like a lit scene instead of material data. At the same time, if you flatten everything too aggressively, you can erase the wear, grain, and surface character that made the source valuable in the first place.
That is why the cleanup stage should be approached deliberately. Crop away conflicting regions. Use the appropriate surface type so the tool understands what kind of material logic to preserve. Keep wear detail when it supports the asset. Reduce it when the image is becoming noisy instead of informative. The best seamless tile usually does not come from maximum processing. It comes from the right amount of correction applied to the right source region.
Readers often want one magic setting that makes any image work. In practice the better skill is knowing what the source still needs. That is the kind of guidance worth putting on a long-form page, because it helps the user make decisions instead of just naming features.
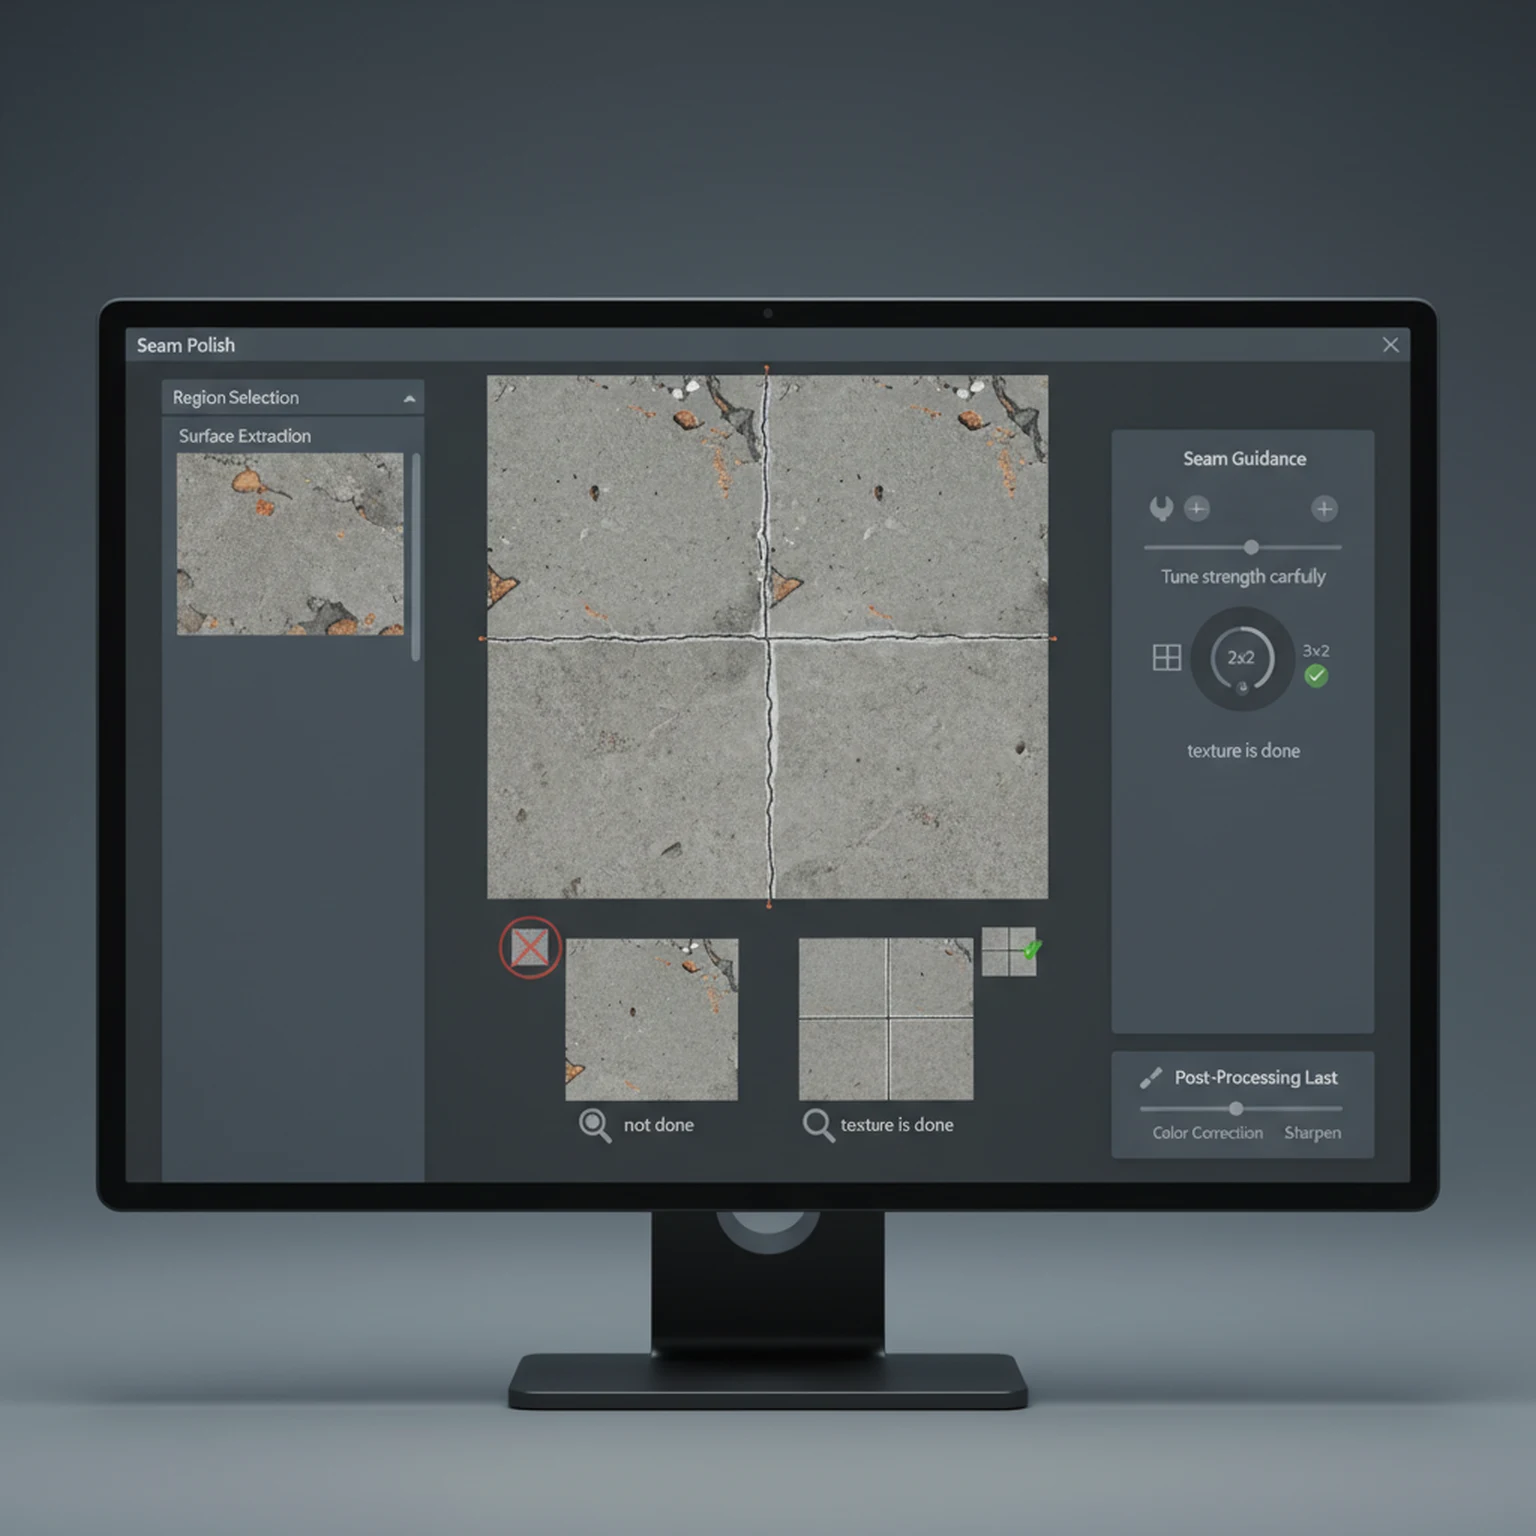
The seamless controls are powerful because they influence how aggressively the system enforces repeat-safe structure. That does not mean stronger is always better. If the strength is too low, edge discontinuities remain obvious when the image tiles. If the strength is too high, the texture can lose the irregularities that made it feel believable in the first place. The same goes for frequency: broad surfaces often need different seam behavior than tight micro-detail materials.
A good working habit is to preview the tile early and often. The single square can look excellent while the 2x2 or 3x3 repeat still reveals a grid. That is why this workflow should always be judged in repeated view, not only in isolated view. If the repeated pattern disappears and the material still retains believable structure, you are in the right range. If the grid is gone but the material now looks synthetic or mushy, you have probably gone too far.
Seed lock also matters more than many users realize. When you find a promising result, locking the seed gives you meaningful comparisons instead of chaotic retries. That is especially useful when you are trying to tune one variable at a time. It turns iteration from guesswork into something closer to controlled testing.
The final goal of this workflow is not just to produce a tileable square. The goal is to produce a base texture that is strong enough to move into PBR map generation. Once the tile is clean, believable, and stable across repetition, the next useful move is often to open PBR Map Generator and build the full material stack. That is where the seamless texture becomes a production asset rather than a cleaned-up reference.
This is also where PLAYTEX AI has a more coherent story than many isolated texture tools. The same platform that helps turn a photo or scan into a seamless base can also help convert that base into albedo, normal, roughness, metallic, AO, height, and emission outputs, then package the result for engine-facing workflows. That sequence is important because it matches the way artists actually work: source intake first, material conversion second, engine handoff later.
Use the output actions deliberately. Download when you only need the texture file, Save to Library when the result should be reusable, and Use in Map Generator when the tile is ready to become a full PBR material. The right next step depends on whether the asset is finished as a base texture or only ready for technical map generation.
Use these when you want tight control over the patch being reimagined.
These controls are optimized for automatic surface finding and flattening.
These settings are the difference between a square image and a tile-safe production texture.
Convert photos, scans, and existing artwork into tileable textures using region selection, surface extraction, seam guidance, and post-processing designed for game surfaces.
Region Select is best when you already know the exact patch you want. Surface Extraction is better when the tool should detect and flatten the best usable surface automatically.
Crop out perspective issues, isolate the cleanest region, and remove harsh lighting direction. If the source is physically wrong, extra styling only hides the problem temporarily.
The seamless engine, strength, frequency, and seed let you steer how aggressively the tool enforces repeat-safe structure. Stronger is not always better; use enough to hide seams without flattening the material character.
Check the tile preview and seam metrics before exporting. A texture that looks good as a single square can still fail once repeated.
Region Select lets you choose the exact patch manually, while Surface Extraction automatically finds and rebuilds the best flat material area from the image.
Yes. It is useful when the concept art contains a good surface idea but still needs tiling, flattening, and seam-safe reconstruction.
Open the live workflow that this guide is documenting.
What Is a PBR Mapping Tool? PBR Map Generator Guide for Game MaterialsUse the web-based PBR mapping tool to turn a texture into a coherent material set with normal, roughness, metallic, ambient occlusion, height, emission, and albedo outputs tuned for real-time engines.
Image Editor Guide for Texture Cleanup, Region Work, and Background RemovalUse the Image Editor to crop, transform, remove backgrounds, tune tone and detail, work on isolated regions, and prep textures before they move into the rest of the PLAYTEX AI pipeline.
Getting Started with PLAYTEX AI Texture ToolsUse this guide to choose the right PLAYTEX AI workflow, understand where each tool fits, and move from idea to game-ready material without bouncing between random experiments.