Editing and Cleanup
Image Editor for Textures: Clean, Mask, Make Seamless, and Export
Correct framing, masks, tone, and local defects in a deliberate order so the next PLAYTEX AI tool receives clean source information instead of having to compensate for preventable problems.
Direct answer
When should you edit a source before making textures or maps?
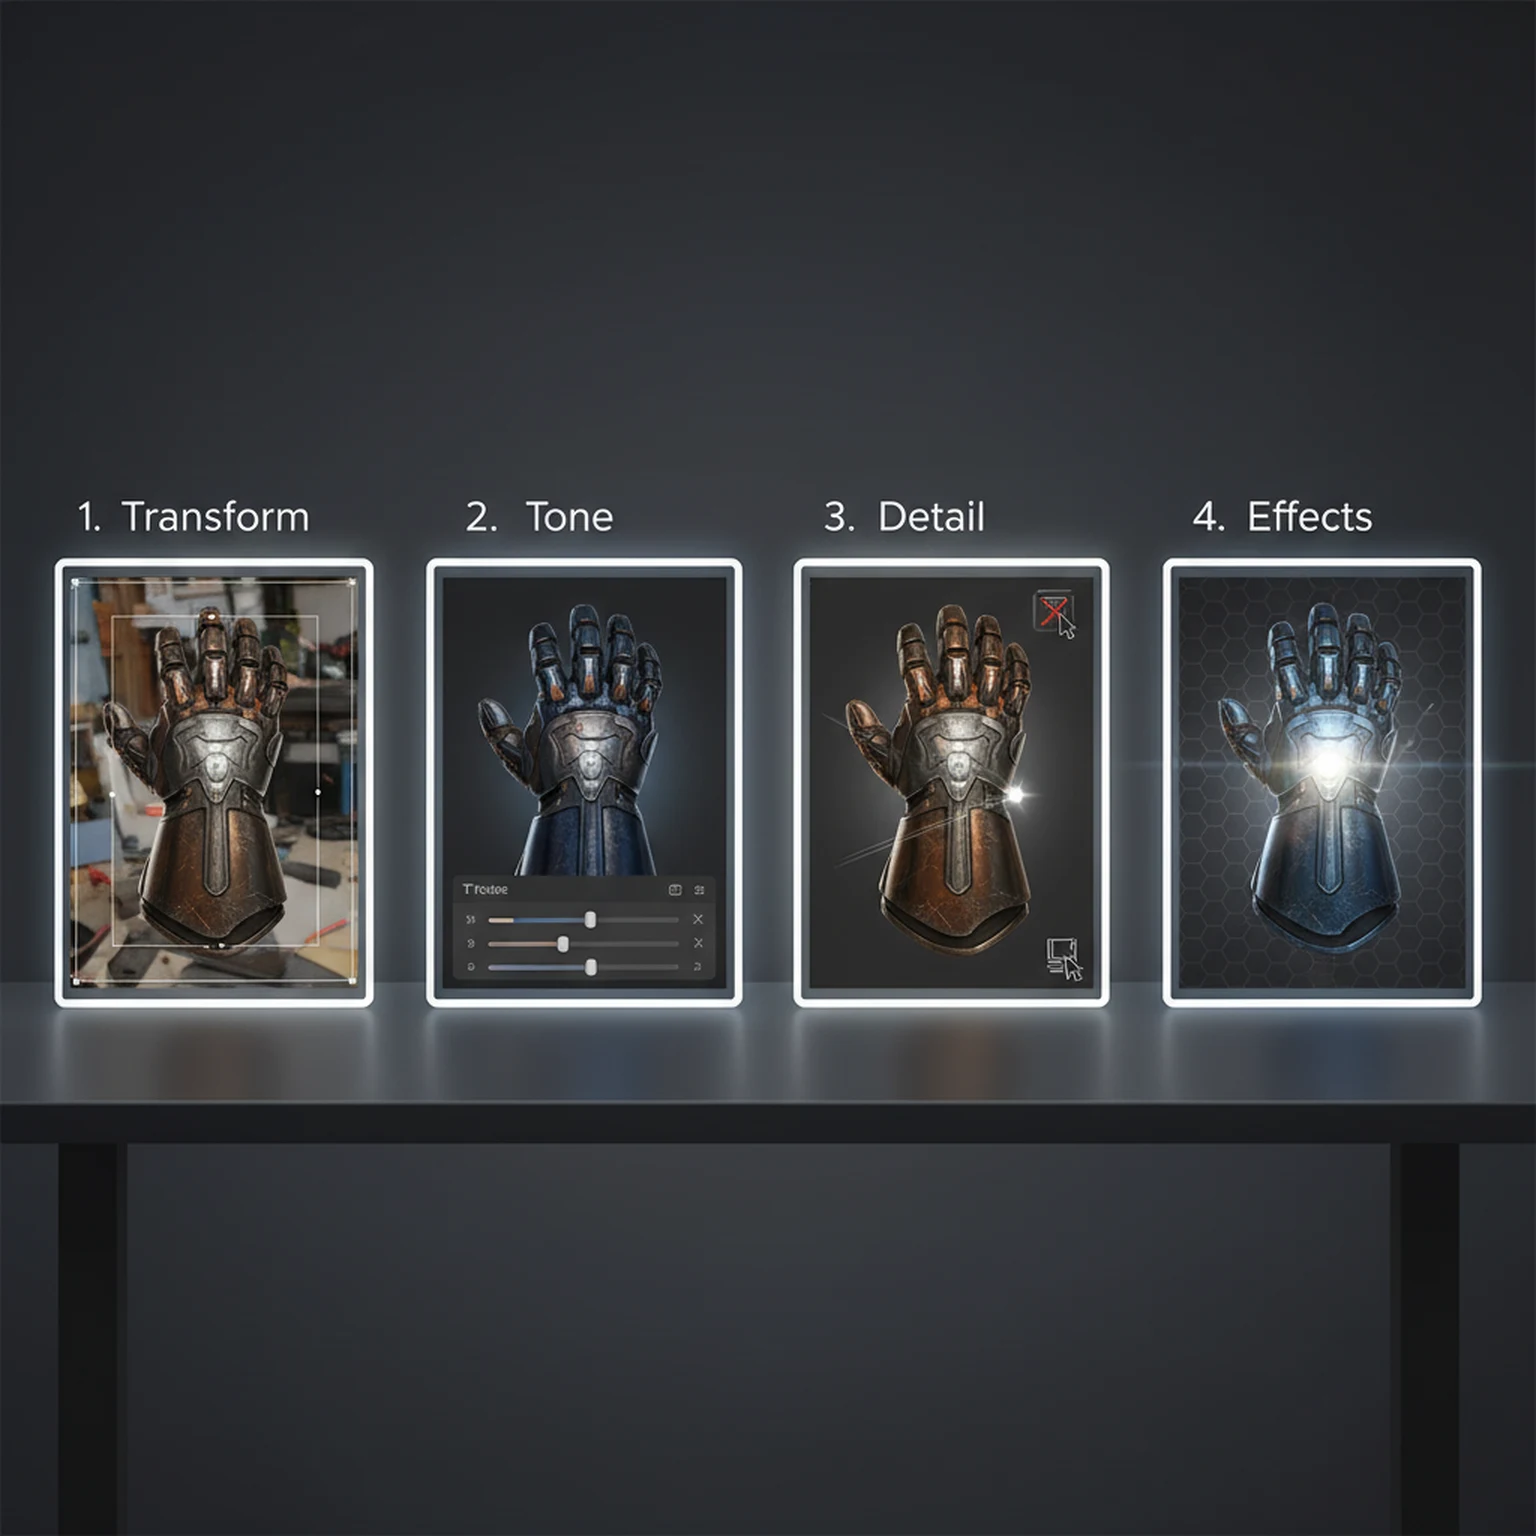
Work from structural to cosmetic: transform and crop first, isolate or mask second, correct tone and color third, then add only the detail or effects the downstream asset actually needs.
How PLAYTEX AI helps: The editor keeps structural transforms, color and tone, masks, local cleanup, and downstream handoffs in one workspace. You can fix source information before seamless conversion or PBR generation magnifies the problem.
What you will get
- Clean source images before generation or export.
- Apply precise edits to a region instead of damaging the full texture.
- Use mask-aware cleanup and finishing tools inside one workspace.
Best use cases
- You need to crop, brighten, sharpen, or recolor a texture source.
- You want to remove a background or isolate an object.
- You need quick last-mile polishing without leaving PLAYTEX AI.
Acceptance test
Approve the asset only when these are true
- Crop, rotation, scale, and perspective are settled before any local cleanup begins.
- Background and region masks have clean edges at 100% zoom and do not leave color fringes.
- Tone corrections remove unwanted source lighting without flattening the material identity.
- Sharpening, bloom, noise, and stylized effects do not create false structure for later PBR maps.
- The file format preserves alpha or source quality required by the next tool.
Settings Reference
Transform and tone controls
These settings fix the fundamentals.
- Rotation, Flip, Scale, and Crop: Correct orientation, framing, and basic composition before the image enters texture generation or export. Use them before any detail work so later edits operate on the correct canvas.
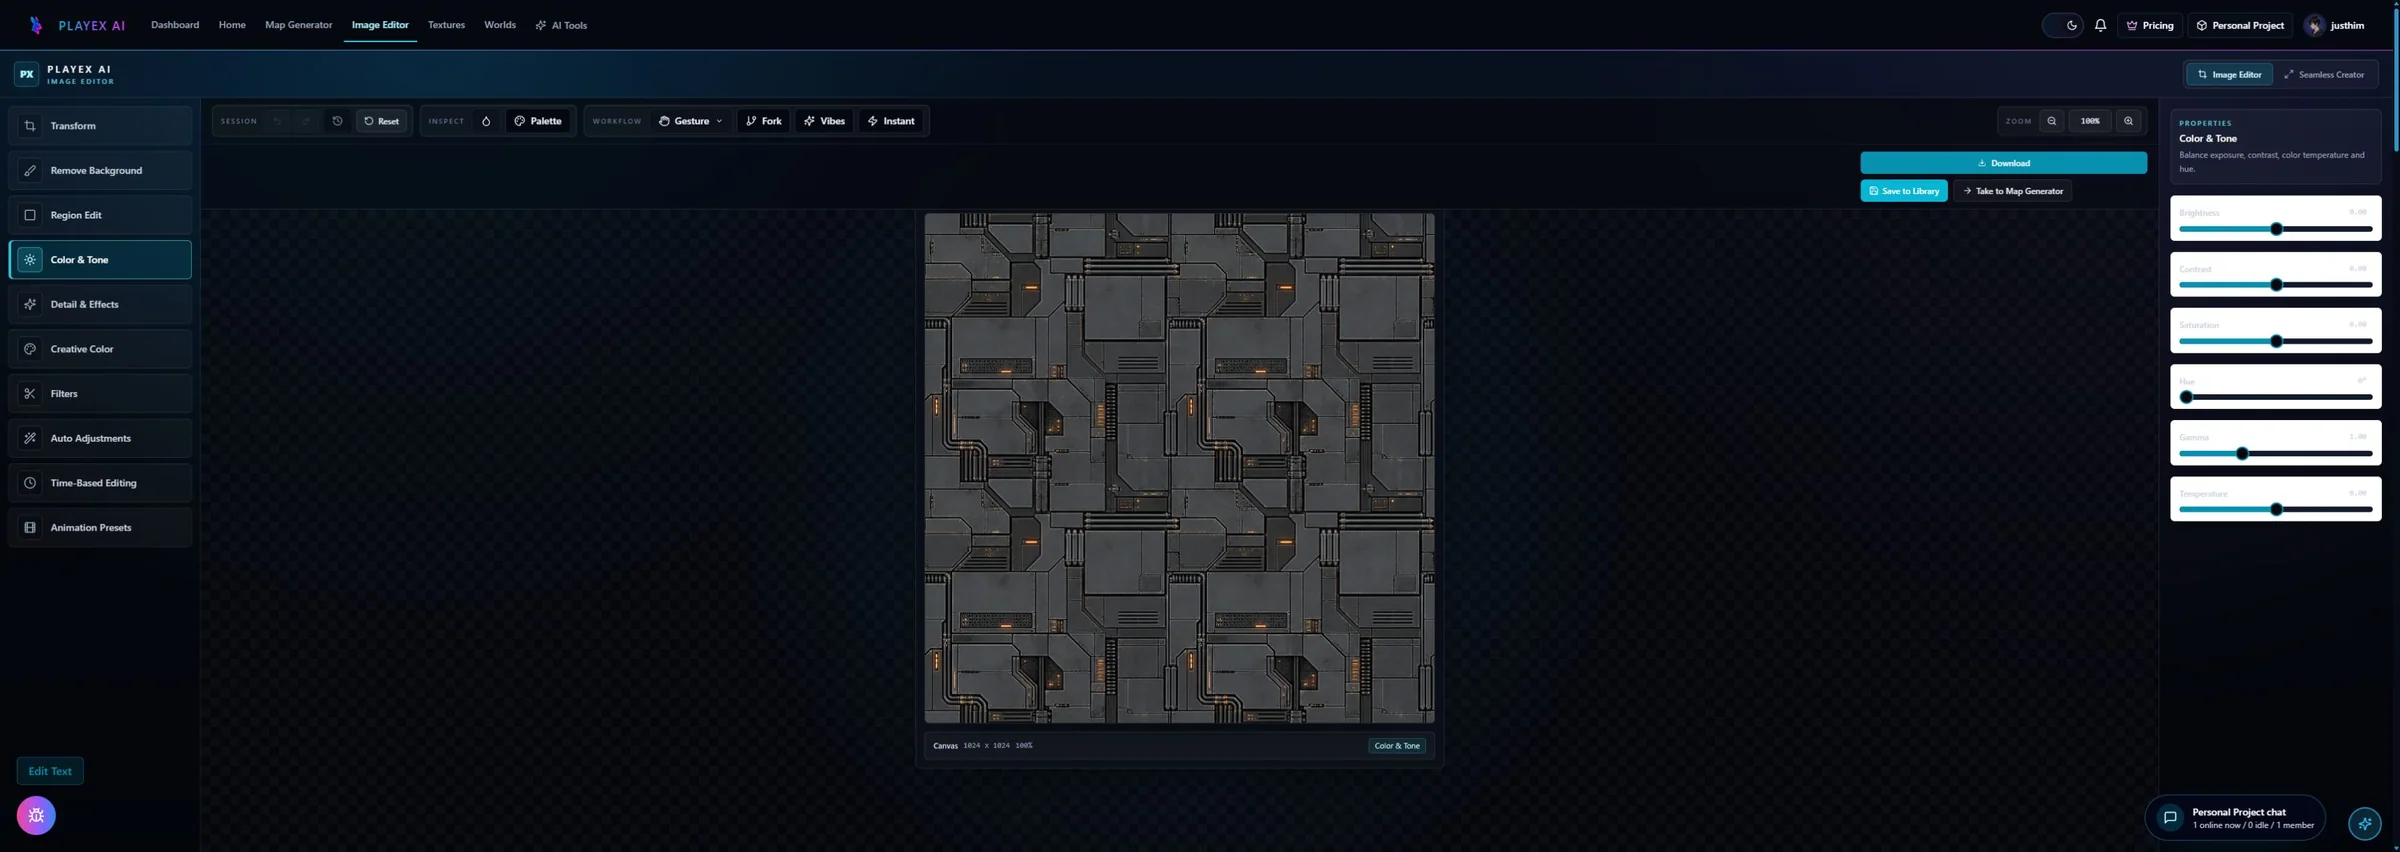
- Brightness, Contrast, Saturation, Vibrance, Hue, Gamma, Temperature: Tune exposure and color relationships across the full image. Adjust these when the texture is too flat, too dull, too warm, or too cool before material generation.
Detail and creative controls
These settings shape the finish and readability of the image.
- Blur, Sharpen, Glow, Bloom, Vignette, Noise: Control edge crispness, softness, bloom, frame focus, and texture grit. Use sparingly. These are finishing levers, not substitutes for a good source image.
- Posterize, Grayscale, Sepia, Invert, Filters: Apply stylized treatment or special looks. Use them for stylized outputs, concept treatments, or utility-specific effects rather than core material realism.
- Auto Contrast, Palette, Forking, and Stop-Here Review: Adds quick exposure correction, color sampling, direction comparison, and a checkpoint for deciding whether the image is ready. Use these when you are comparing cleanup directions or deciding whether further edits are helping or only adding noise.
Mask and region controls
These are the precision tools that keep edits local and reversible.
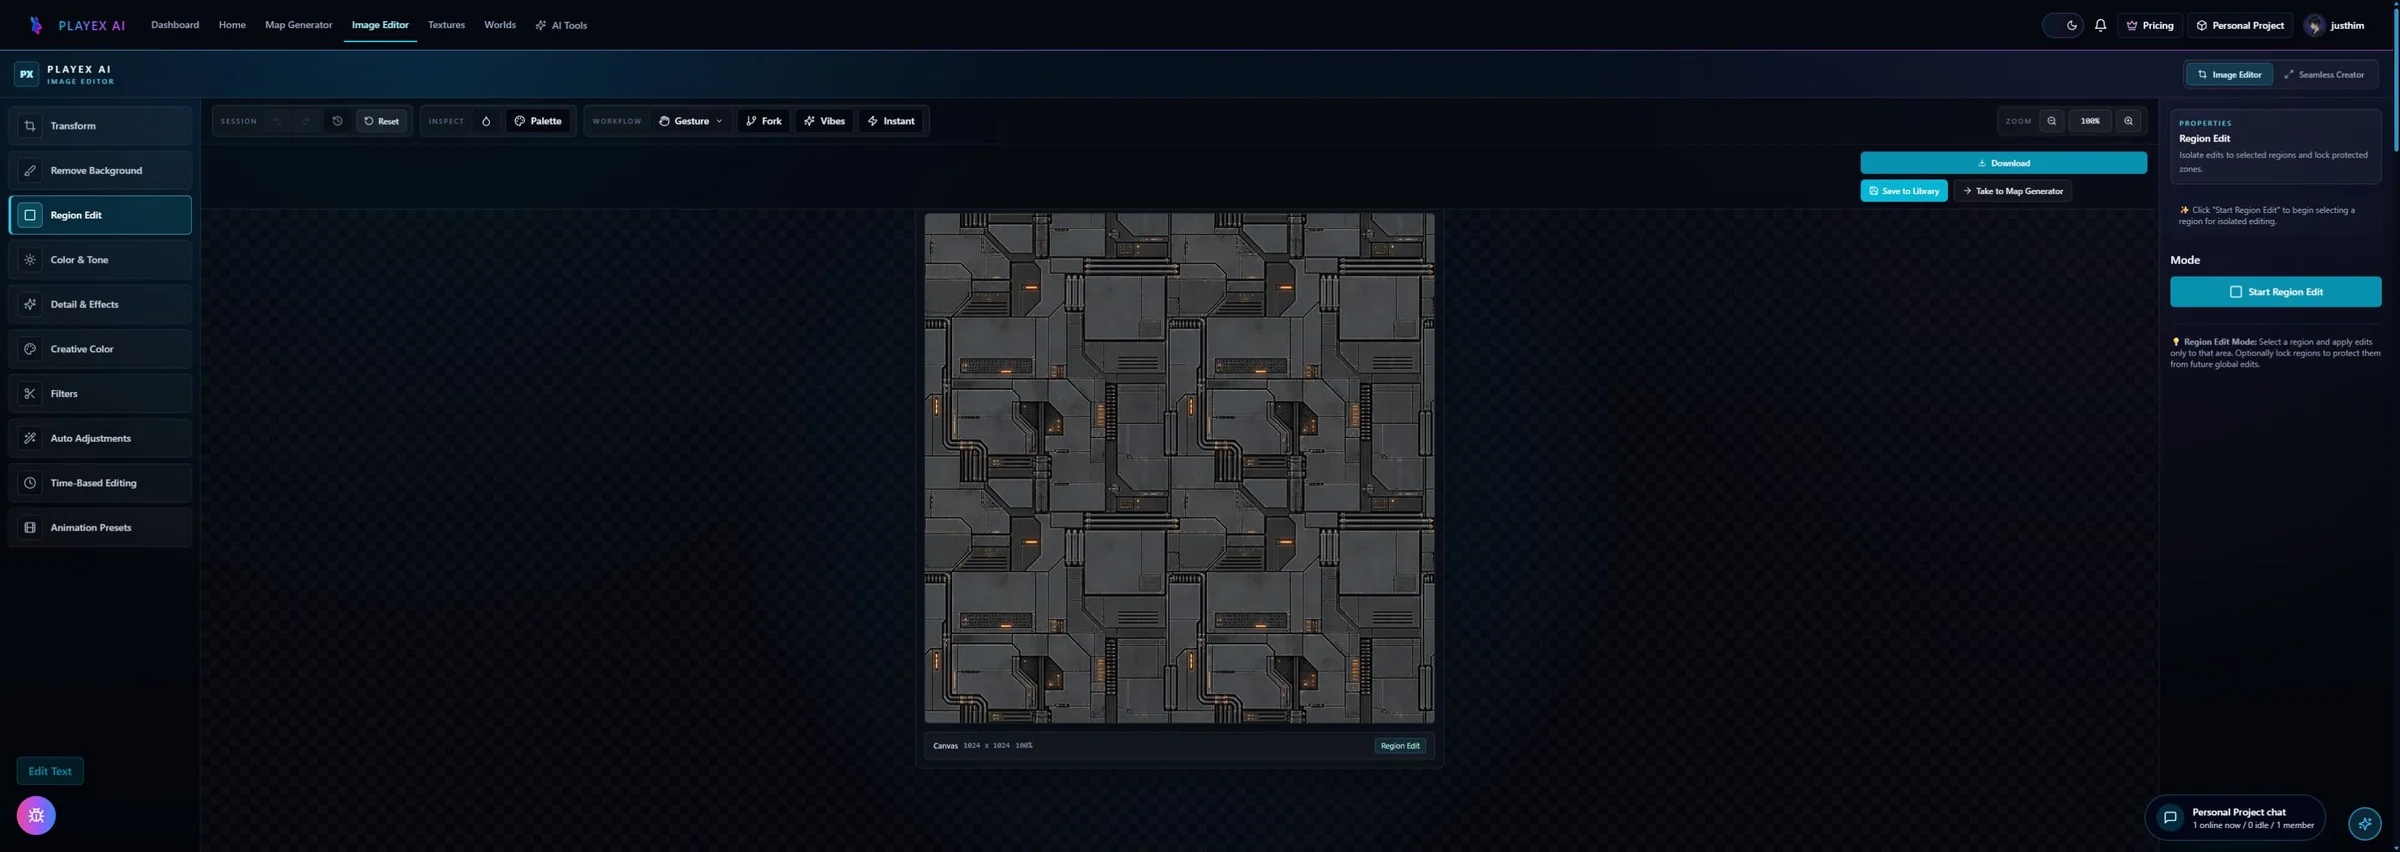
- Region Edit Mode, Feather, Shape, and Lock After Apply: Defines what area receives the edit and how softly it blends into the untouched image. Use rectangle or ellipse regions when only one part of the image needs correction.
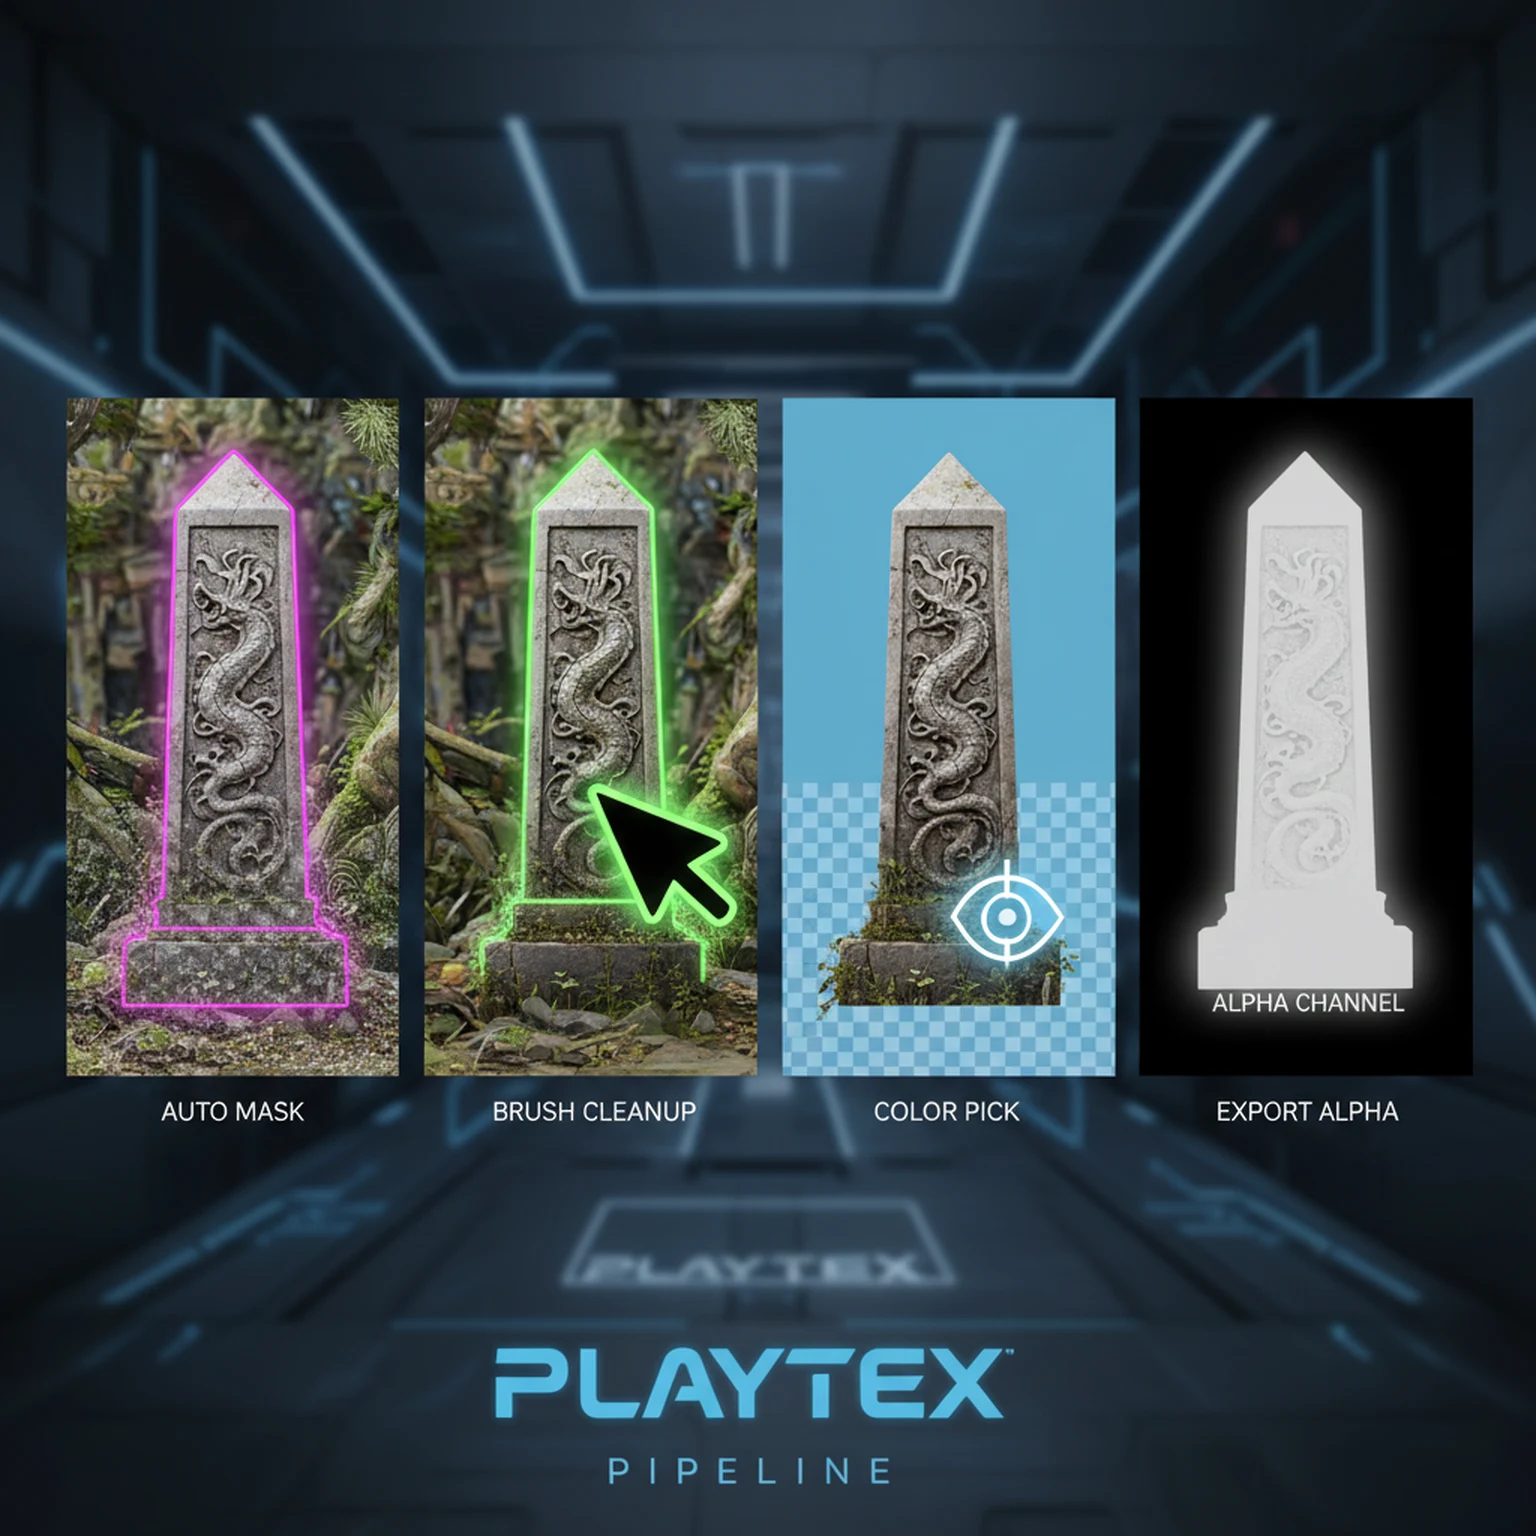
- Background Removal Strength and Edge Aware: Controls how aggressively the mask cuts away the background and how carefully it follows edges. Increase strength for obvious subject separation and keep edge aware on for hair, cloth, or uneven silhouettes.
- Brush Mode, Brush Size, Brush Hardness, Object Mode, Color Pick Mode: Refines the background mask manually or semi-automatically. Switch to brush for local cleanup, object mode for broad subject removal, and color pick when a background hue dominates.
- Invert Mask, Save Mask PNG, and Clear Mask: Manages the alpha matte as an editable layer rather than a one-shot background-removal result. Invert when the wrong side of the mask is selected, save the mask when it should be reused externally, and clear it when the matte is no longer trustworthy.
Workflow
Correct framing, masks, tone, and local defects in a deliberate order so the next PLAYTEX AI tool receives clean source information instead of having to compensate for preventable problems.
Step 1: Upload and decide if the edit is global or local
If the whole image needs the same correction, stay in standard editing mode. If only one section needs work, turn on region editing first so you do not degrade the full texture.
Step 2: Handle transform and cleanup before stylized effects
Rotate, crop, flip, background-remove, and basic tone-correct before you add creative effects. Structural cleanup should happen before visual seasoning.
Step 3: Use region lock when you want layered refinements
Create a region, feather it, and lock after apply when you need to protect one area while continuing to adjust the rest of the image.
Step 4: Export or pass the image into the next tool
Once the source is stable, send it to Image to Texture, AI workflows, or PBR generation. The editor is best used as a cleanup stage, not as a place to endlessly restyle the asset.
Common Pitfalls
- Do not start with stylized effects if the crop, orientation, or exposure is still wrong.
- Do not over-sharpen textures that already contain high-frequency noise.
- Do not use hard-edged regions when the edit should blend naturally into the rest of the texture.
What should I fix before converting an image to a texture?
Fix crop, rotation, perspective, hard shadows, strong highlights, large color gradients, logos, and distracting local defects before seamless conversion.
Should color correction happen before PBR map generation?
Yes when the source contains accidental lighting or a color cast. PBR generation can propagate those values into roughness, height, AO, or emission if they are left in the source.
When should I use a region mask?
Use a region mask when one defect, object, label, highlight, or wear patch needs a local change and the rest of the texture should remain untouched.
Can sharpening improve a texture source?
Light sharpening can restore clarity after resizing, but aggressive sharpening creates halos and false micro-detail that later normal or height maps may exaggerate.
What format should I export from the image editor?
Use a lossless format when the next tool needs clean source data or alpha. Choose final runtime compression only after the texture and material maps have been approved.
Primary sources
Official specifications and renderer documentation
PLAYTEX AI guidance is paired with official specifications and platform documentation where the handoff depends on an outside convention.
Open the live workflow that this guide is documenting.
Image to Texture: Convert a Photo into a Seamless TextureExtract a usable surface from a photo, scan, artwork crop, or generated reference; correct the source problems first; then tune seamless reconstruction while protecting the material character.
AI Texture Generator: Make Seamless Game Textures from a PromptGenerate repeatable surface candidates from a material brief, select for scale and tiling rather than spectacle, then move the strongest result into cleanup or PBR map generation.
How to Make Game Textures with PLAYTEX AI: Complete WorkflowStart with the asset you actually have, move through only the tools that solve its current problem, and finish with a repeatable material or lighting handoff.