Texture Troubleshooting
Why Does My Roughness Map Look Too Shiny? A Diagnostic Field Guide
If a roughness map looks too shiny, first confirm that a smoothness or gloss map is not connected to a roughness input. Then verify linear data import, the sampled channel, the scalar range, and the lighting used for judgment. In a roughness map, black is smooth and white is rough.
Release notes
What changed?
- : Roughness control and saved-file example added Added an original test mask, separately observed baseline and adjusted previews, and a verified saved PNG. Preserved the August engine evidence and its limitations.
- : Historical sample statistics corrected Recounted the unchanged August 29 PNG: 28 of 1,048,576 pixels exceed 0.95 (about 0.0027%). Replaced the incorrect zero-pixel statement and retained the original sample, hashes, and export-verification limits.
- : Original engine-contract evidence published Added a symptom-first decision tree, measured PLAYTEX AI roughness data, byte-verified Unity and Unreal exports, and explicit editor-capture limitations.
Direct answer
What should you check first when roughness looks too shiny?
Start with a flat roughness value under a neutral reflection environment. If the flat value behaves correctly, the failure is in the source pixels, inversion, packing, or import. If it still looks wrong, inspect the material graph, metalness or specular response, normal map, exposure, and environment before repainting roughness.
This page owns the diagnosis: The Texture Troubleshooting Field Guide remains the broad symptom index. This guide isolates one roughness failure. Use Roughness Map Generator to reshape or invert the scalar source, PBR Map Generator to review the coordinated material, and PBR Engine Converter to create the destination package.
What you will get
- Separate an inverted-map failure from a color-space, channel, shader, or lighting failure.
- Run a one-variable test that identifies whether the bytes or the material setup are wrong.
- Deliver the same canonical roughness source correctly to Unity and Unreal Engine.
Symptoms this guide is designed to isolate
- A dry surface looks wet or mirror-like after engine import.
- A roughness texture works in one renderer but becomes glossy in another.
- A packed ORM or mask texture changes behavior after channel packing.
- The material becomes shinier at distance or after runtime compression.
Acceptance test
Approve the asset only when these are true
- Black means smooth and white means rough in the destination input.
- The standalone or packed scalar channel is sampled as linear / non-color data.
- The material reads the intended channel, with no accidental second inversion.
- A flat 0.7 reference produces a broad highlight before the authored texture is restored.
- Roughness is judged with fixed camera, exposure, material class, normal map, and environment.
- The imported runtime texture is checked after compression and mip generation.
September 2026 control example: compare a preview with a saved roughness map
This example uses an original grayscale test mask to make the control changes easy to see. The screenshots show separately observed, settled states. They are not a recording of one continuous session or proof of a better-looking material in an engine.
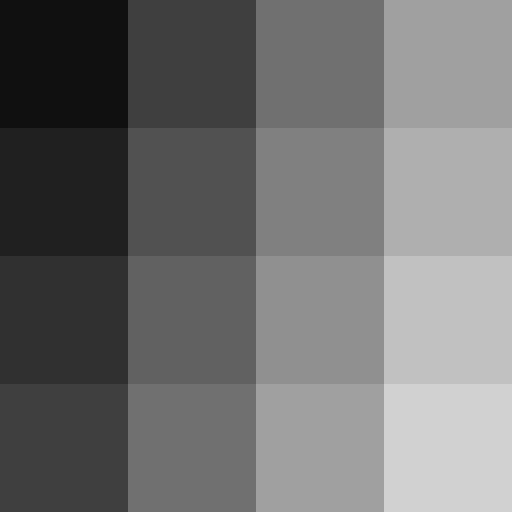
Open the PLAYTEX AI Roughness Map Generator and choose an image you have permission to use. For a baseline, select Map and check Black point 0, White point 255, Contrast 1, Output Roughness and Invert source luminance off. Read the controls on screen; a returning session may restore different values.
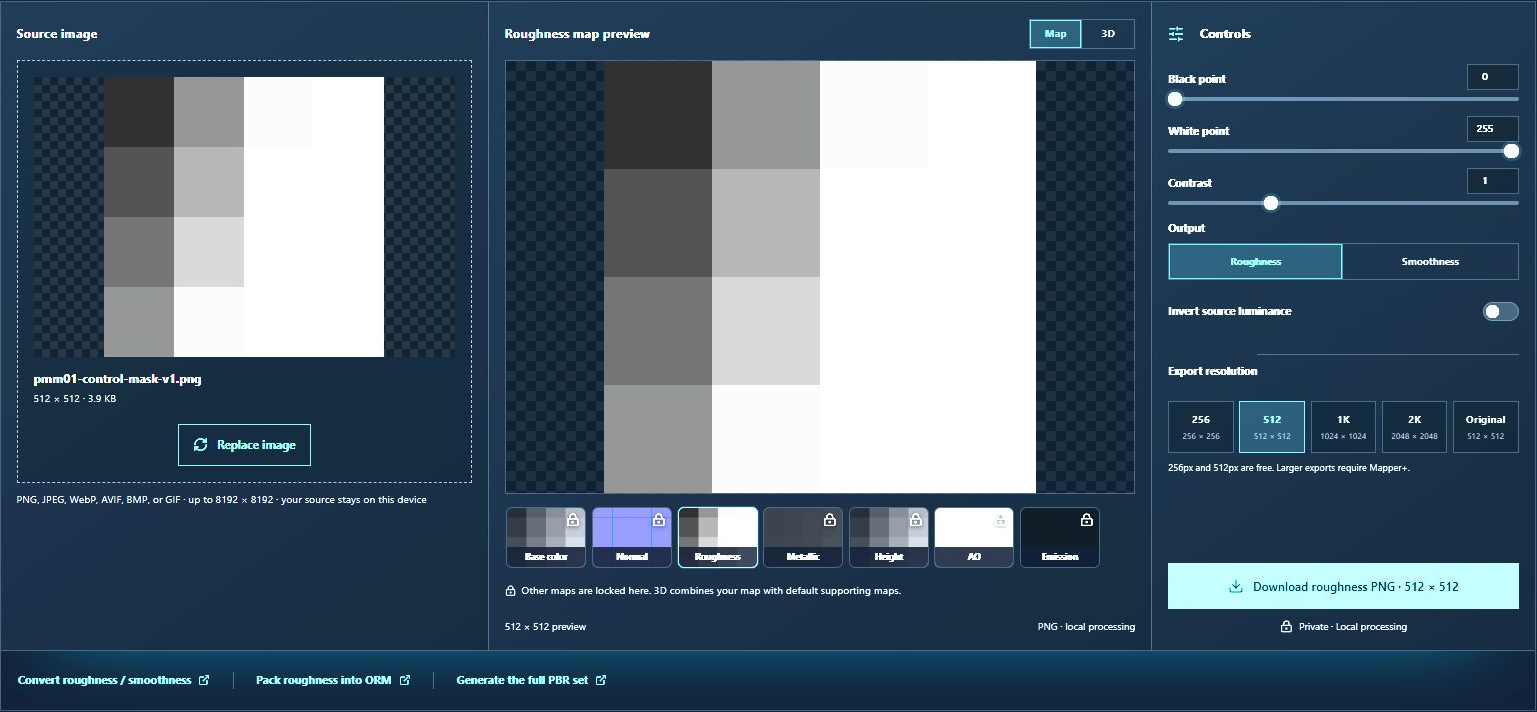
Keep the same source and other controls fixed. Change only White point from 255 to 220, then compare the lighter bands. If separate areas merge into white, you may have lost variation; a brighter preview is not automatically a better material.
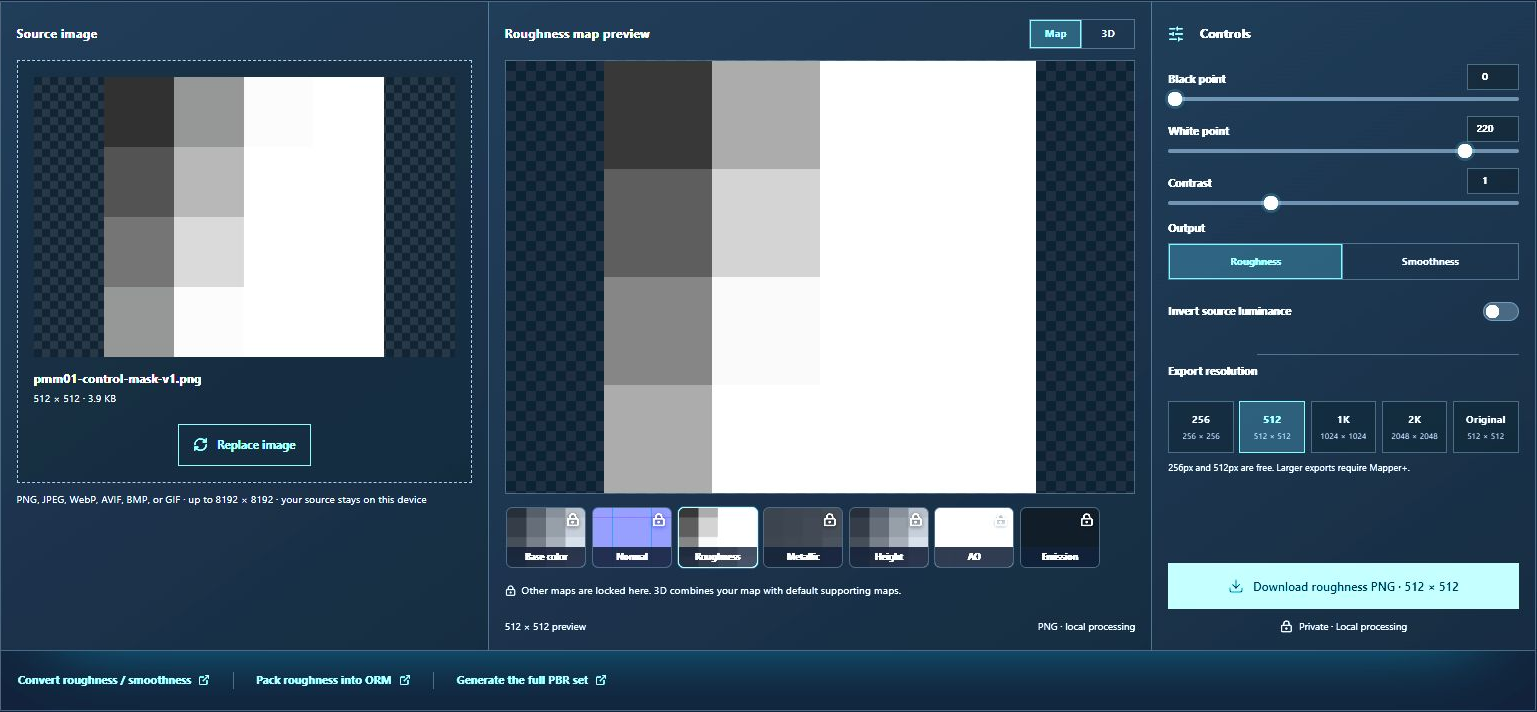
With the adjusted Roughness settings, use Download roughness PNG at a size available to your account. Open the saved file to confirm its dimensions and output convention; an on-page preview alone does not confirm a download.
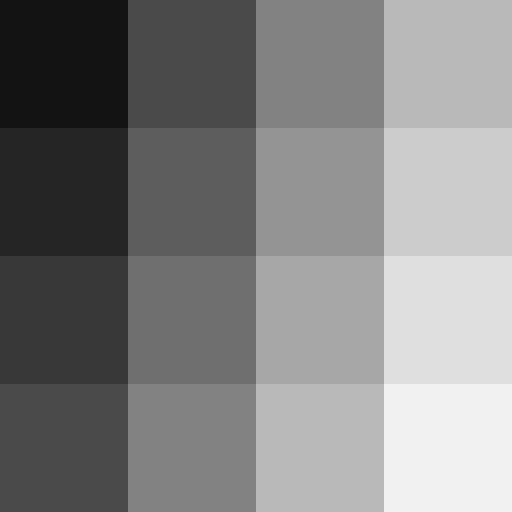
Inspect your roughness map. If you need additional map channels, continue in the PBR Map Generator. The second link opens that route; it does not carry over the source, map or settings.
The fastest diagnosis separates texture bytes from material behavior
A flat scalar value is more useful than an artistic repaint because it removes the image as a variable. If known flat values produce the expected sharp-to-broad sequence, the shader can respond correctly and the remaining problem is in the authored values, inversion, packing, or import. If flat values fail, editing the texture cannot repair the graph or scene.
Keep the camera, environment, exposure, material class, normal map, and clear-coat state fixed during each A/B. Roughness controls the angular spread of reflected light. It does not switch reflections off, and it does not replace metalness or dielectric base reflectance.
The measured PLAYTEX AI source stays in a deliberately rough range
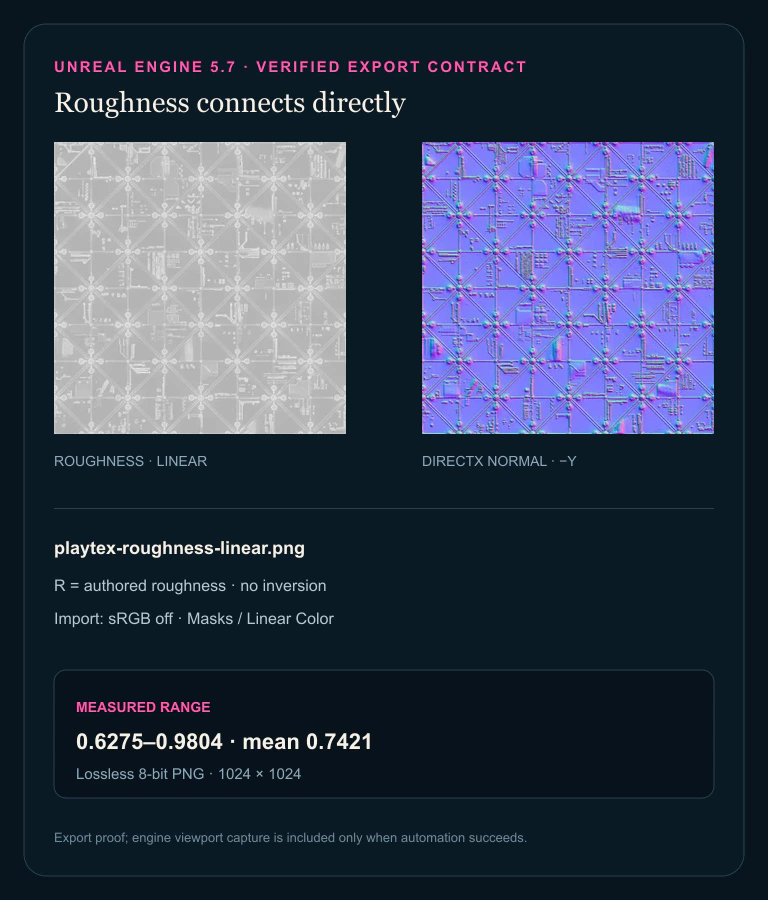
The evidence set uses a repository PLAYTEX AI PBR Map Generator output at 1024 × 1024. After deterministic Rec. 709 luminance extraction, the roughness values span 0.6275 to 0.9804, with mean 0.7421 and standard deviation 0.0453. In this recorded 1024 × 1024 sample, 28 pixels (about 0.0027%) exceed 0.95; no pixels fall below 0.05.
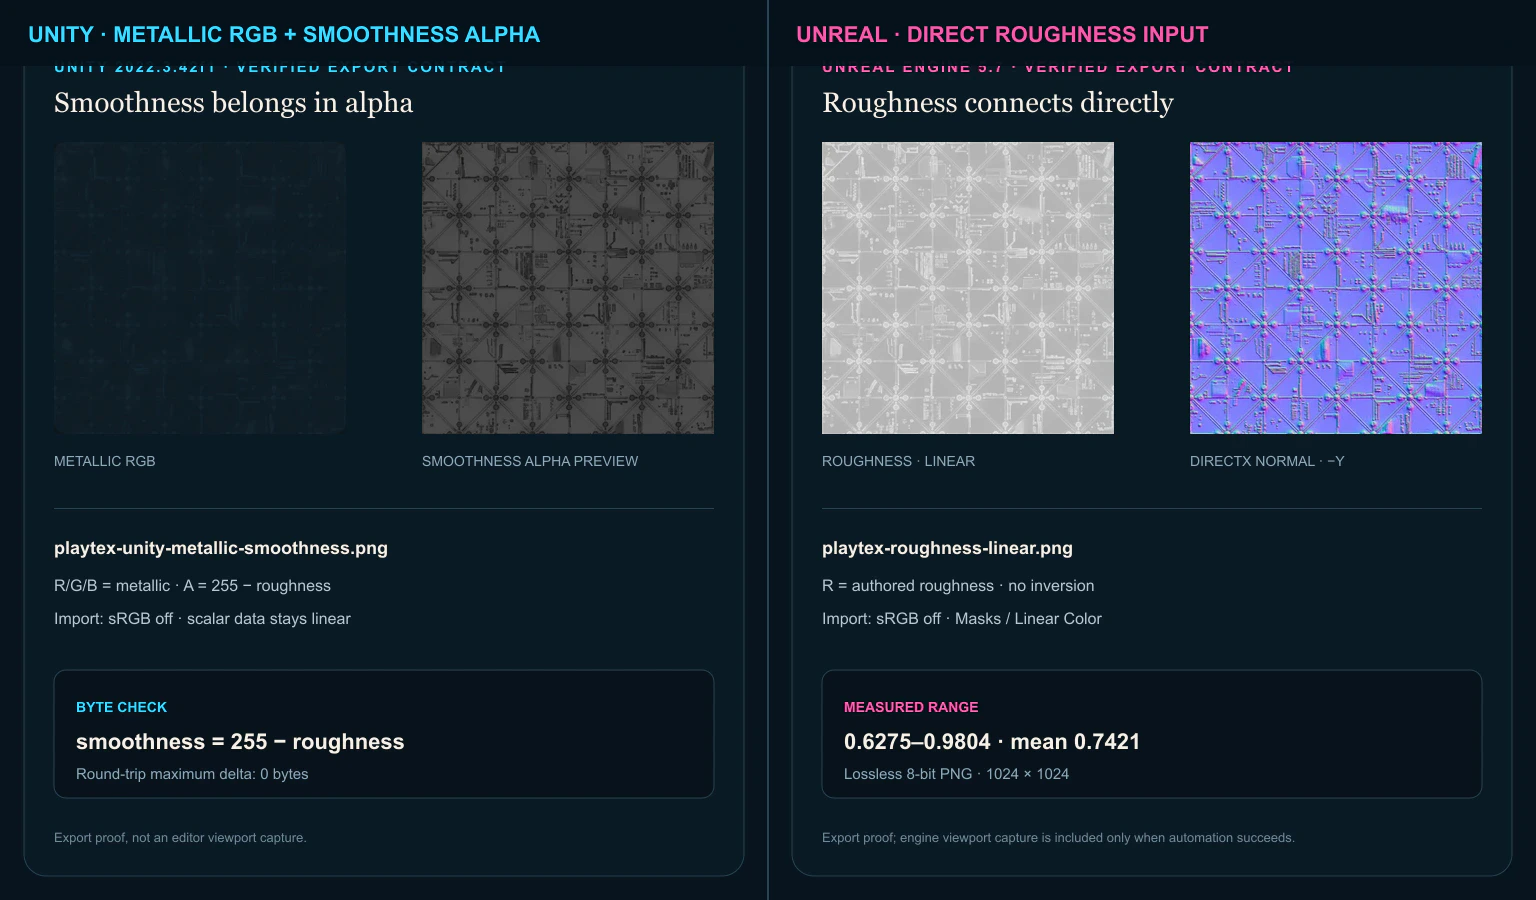
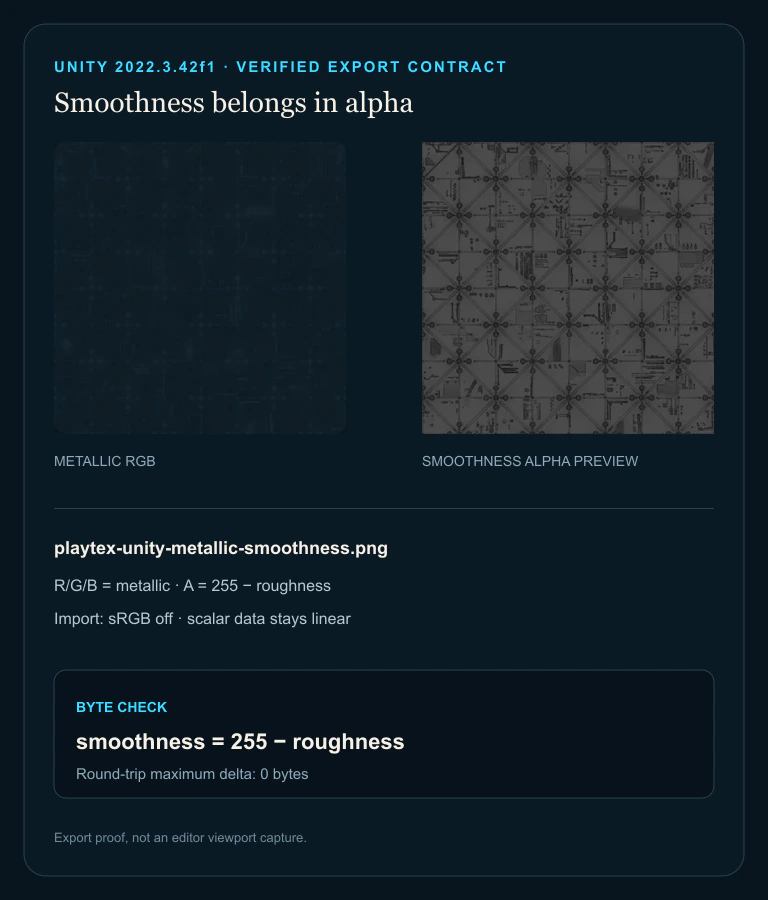
Those figures do not prove physical accuracy. They prove which bytes entered the two delivery contracts. The exact 8-bit inversion produced a maximum round-trip delta of 0 bytes, so the Unity smoothness alpha can be traced back to the canonical roughness source without an unrecorded transform.
Unity and Unreal consume different delivery contracts
For the Unity evidence export, metallic occupies RGB and smoothness occupies alpha. Smoothness is computed as 255 minus each roughness byte, and the packed texture is treated as linear data with sRGB disabled. The export sheet is a byte-verified contract proof, not a Unity viewport capture: the installed Unity 2022.3.42f1 editor could not render unattended without local license activation.
For the Unreal evidence export, the canonical roughness is delivered directly and sampled with sRGB disabled using mask or linear-color semantics. Unreal material graphs remain configurable, so a project can choose another channel; the proof describes the documented direct-input setup rather than every possible graph.
What this evidence does and does not establish
The downloadable manifest records source paths, dimensions, method, metrics, SHA-256 digests, engine versions, and expected import settings. It makes the export reproducible and catches inversion or channel-layout mistakes. The images are lossless 8-bit PNGs generated from the same approved source maps.
The test does not claim cross-engine pixel equivalence. BRDF implementation, reflection filtering, normal filtering, exposure, tone mapping, mipmaps, GPU compression, clear coat, and project lighting can all change the visible result. The destination renderer and shipping build remain the final review surface.
Controls that can make a correct map look glossy
Source-value checks
These controls change the values before engine-specific packing.
- Output convention: Roughness keeps black smooth and white rough; smoothness reverses that direction. Invert exactly once only when the destination explicitly expects smoothness or gloss.
- Black point: Sets where values begin reaching the smooth end of the range. Raise it carefully when isolated dark noise creates pin-sharp sparkles. Do not crush valid coated or polished regions.
- White point: Sets where values reach the roughest end of the range. Lower it when genuinely rough regions never become broad enough under the controlled scene.
- Contrast: Expands or compresses local differences around the middle of the range. Reduce it when the material looks patchy, sparkles at distance, or flips abruptly between wet and dry.
Import and shader checks
A correct PNG can produce the wrong material when its bytes are interpreted incorrectly.
- sRGB / color-space flag: An sRGB decode reshapes midrange bytes before the material receives them. Turn sRGB off for roughness, smoothness, metallic, AO, and packed numeric textures.
- Sampled channel: Selects which component actually drives the roughness or smoothness input. Match the export contract: direct R for a standalone map, G for common ORM, or A for Unity metallic smoothness.
- Compression and mipmaps: Quantize and filter roughness variation for runtime use. Inspect them when block-shaped highlights appear or the surface changes finish as the camera moves away.
Run the shortest test that can isolate the failure
If a roughness map looks too shiny, first confirm that a smoothness or gloss map is not connected to a roughness input. Then verify linear data import, the sampled channel, the scalar range, and the lighting used for judgment. In a roughness map, black is smooth and white is rough.
Step 1: Lock the comparison scene
Use one neutral dielectric material, fixed camera and exposure, and a high-contrast environment with recognizable reflected shapes. Disable artistic post effects while diagnosing. A changing light rig can hide or imitate a roughness change.
Step 2: Replace the texture with a flat 0.7 value
A roughness value around 0.7 should produce a broad, soft response in a conventional metallic-roughness shader. If it still appears sharp, the texture is not the first suspect: inspect the socket, material model, metalness or F0, normal strength, reflection environment, and tone mapping.
Step 3: Compare the map with its exact inverse
If the inverse immediately restores the expected response, the source was smoothness or gloss, or the pipeline inverted roughness twice. Use Roughness Map Generator to preview the direction, but keep only one documented inversion in production.
Step 4: Prove the imported scalar bytes
Disable sRGB for standalone roughness and packed material data. Confirm the shader reads the intended channel. A mid-gray test patch should remain the intended numeric value after import; color decoding must not reshape it.
Step 5: Restore one material input at a time
Reconnect roughness, then normal, metallic, AO, and other layers separately. This identifies cross-channel problems such as a metallic mask connected to roughness, a packed-channel mismatch, or normal detail that makes highlights look unnaturally tight.
Step 6: Export the destination contract and retest at distance
Review the coordinated stack in PBR Map Generator, then create the Unity or Unreal layout with PBR Engine Converter. Inspect the imported texture, mip levels, and runtime compression at representative camera distances before approval.
Symptom-to-cause troubleshooting matrix
| Observed symptom | Isolation test | Likely cause | Corrective action |
|---|---|---|---|
| Bright parts become glossier than dark parts | Compare the source with its exact inverse. | Smoothness or gloss is connected to roughness. | Invert once, rename the contract, and remove any second inversion. |
| Mid-gray becomes much smoother after import | Compare a 128-byte patch before and after import. | sRGB decoding is changing scalar values. | Disable sRGB / mark the texture as non-color data. |
| The map preview changes but the material does not | Feed solid black and solid white into the same socket. | Wrong socket, sampled channel, or disconnected graph. | Trace the material input and document its channel. |
| ORM works in one renderer but not another | Preview R, G, B, and A separately. | Packed-channel convention mismatch. | Repack for the destination rather than relabeling the file. |
| A flat 0.7 value is still mirror-like | Disconnect other layers and use a neutral dielectric. | Shader, metalness, clear coat, normal, or lighting issue. | Fix the material or scene before repainting roughness. |
| Gloss changes at distance | Inspect mip levels and toggle runtime compression. | Mip filtering or block compression. | Reduce micro-contrast or choose a better data compression setting. |
| White roughness still shows reflections | Use a recognizable environment and rotate the view. | Expected energy-conserving reflection is being mistaken for gloss. | Judge highlight width, not whether reflection disappears. |
| Only tiny regions sparkle | Clamp the darkest values temporarily. | Dark outliers or excessive high-frequency contrast. | Raise the black point modestly and review the mip chain. |
Common fixes that create a second problem
- Inverting first without proving the destination convention; a second inversion restores the original failure under a new filename.
- Leaving sRGB enabled because the map is visually grayscale; grayscale appearance does not make scalar data a color texture.
- Judging roughness under an empty, uniform, or overexposed environment that contains no readable reflected shapes.
- Using metallic as a general shininess slider; material class and reflection spread solve different problems.
- Assuming a packed texture uses the same channels in every renderer. ORM, Unity masks, and custom Unreal graphs are different contracts.
- Repainting albedo to hide a fixed highlight before the roughness socket and reflection environment have been tested.
- Approving only the source PNG and never checking the imported mip chain or runtime compression.
Why does my roughness map make everything shiny?
The most common causes are a smoothness or gloss map used as roughness, sRGB decoding on scalar data, the wrong packed channel, values clustered near black, or a material and lighting setup that makes reflections look stronger than expected. Test a flat 0.7 roughness value before editing the texture.
Should a roughness map be inverted?
Only when the source is actually smoothness or gloss, or when the destination specifically expects smoothness. For normalized data, smoothness equals one minus roughness. Keep that conversion at one named handoff step.
Should roughness use sRGB?
No. Roughness stores numeric material data and should normally use linear or non-color sampling. The same rule applies when roughness is packed with AO and metallic.
Which channel should contain roughness?
A standalone grayscale file can use red. Common ORM stores roughness in green. Unreal material graphs are configurable. Unity metallic workflows commonly store smoothness—not roughness—in alpha. The shader contract is authoritative.
Why does the material still look glossy with a white roughness map?
Confirm the white map is connected and sampled as linear data. Then inspect the environment, exposure, tone mapping, metalness or specular F0, clear-coat layers, and normal map. Rough surfaces still reflect light; roughness spreads the reflection rather than deleting it.
Can base-color brightness generate correct roughness?
Not by itself. A photograph combines lighting, exposure, pigment color, shadows, and reflections rather than measuring microscopic surface slopes. Luminance can seed an editable map, but material references and a lit review are still required.
Primary sources
Official specifications and renderer documentation
PLAYTEX AI guidance is paired with official specifications and platform documentation where the handoff depends on an outside convention.
Open the live workflow that this guide is documenting.
What Is a Roughness Map? Values, Smoothness, and PBR SetupA roughness map stores a 0–1 value per texel that controls how narrowly or broadly a material’s specular reflection is distributed. Black (0) is smooth with a tight, sharp highlight; white (1) is rough with a broad, lower peak. It does not by itself decide whether a surface is metal or set a dielectric’s base reflectance.
PBR Texture Maps Explained: Albedo, Normal, Roughness, Metallic, AO, Height, and EmissionA PBR material separates visible surface properties into coordinated texture maps. Base color describes surface color, normal and height describe relief, roughness controls reflection spread, metallic classifies conductors, ambient occlusion adds limited local contact shading, and emission identifies self-lit regions.
The Game Developer's PBR Texture HandbookAs of August 2026, this handbook gives game developers and material artists one engine-aware PBR texture system: map semantics, base color and delighting, normals and height, roughness, metallic classification, support maps, seamless authoring, calibrated material families, controlled-light review, color space, formats, channel packing, eight renderer targets, runtime budgets, production QA, and troubleshooting.
Texture Troubleshooting Field Guide for PBR Materials and Game AssetsAs of August 2026, this guide diagnoses 13 common texture failures with the same repeatable pattern: symptom, likely cause, two-minute test, correction, prevention, and a final acceptance check. The companion PDF contains 64 pages and a 15-point preflight for PBR materials, transparent PNGs, GLB assets, mipmaps, and texture memory.